Monday, December 31, 2007

The Best of 2007

Food bloggers from around the world are sharing their best moments of the year 2007, and you are invited to take a look!
BestOf2007


28 Cooks: Fiber rounds up the best snacks, bites and nibbles of each month in two awesome posts- a snack addict's idea of heaven, for sure! Read her post to get some great ideas for your own parties this year.

Ahaar: Mandira ponders over the big changes in her life over the year and highlights some favorite dishes that gave her "something new - a new taste, a new recipe, a new grain, a new flavor..." and were delicious as well.

A Mad Tea Party: Anita round up her favorite posts of the year, starting with the post that led to a poori-frying frenzy in the Indian food blog world with its timely reminder of moderation and common sense.

Anali's First Amendment: Anali writes a recap of the renovations on her blog/cooking life during 2007, including well-organized recipe binders. Her Homemade Bread Pledge is something I'm definitely excited about.

An Italian in the US: Marta chronicles the best culinary moments of the year, including learning to bake bread and make home-made pasta, participating in food blog events and hosting her own, and making her first liqueurs and jams. Now that counts as a very productive year indeed.

A Suitable Spice: Minti, in only the second (!) post on her blog, tells us all about the culinary highlights of her year, and her cooking aspirations for the year to come.

Canela & Comino: Gretchen points out some delicious favorites from the months since she started blogging (including some tasty Peruvian stews) and shares her list of things to make in 2008. My favorite bit- she found recipes to use up 125 lbs of plantains that were gifted to her this year!

Champaign Taste: Lisa has a tough time choosing just 10 dishes of the ones she made this year, but does end up with a fantastic list of "keeper" recipes, including one of my own favorites: Gobhi Aloo Sabji.

Coconut and Lime: Rachel chooses one favorite original recipe for each month of the year, including one with the very intriguing name "smearcase".

Cook (almost) Anything: Haalo selects a baker's dozen of gorgeous recipes for 2007. Be prepared to be dazzled by everything from purple gnocchi to basil ice cream.

Cooking 4 All Seasons: Srivalli gives us the story of how her blog took shape, along with her favorite dishes, meals and posts of the year. Her cooking resolution for 2008 is one of my resolutions too.

Cooking from A to Z: Kaykat writes a thoughtful account about how cooking and blogging has led her to think more "about the "right" things", something that many of us can identify with. She shares a list of 10 favorite dishes, plus her favorite pooch treats of the year. Dale thanks you, Kaykat!

Culinary Bazaar: Dhivya gets nostalgic, and captures 2007 in three desserts and their associated sweet memories, all in one heartfelt post.

Culinary Types: T.W. Barritt reminisces about encounters with all kinds of culinary types- including chefs, home cooks, trend-makers and food bloggers! Click through to get to know them more.

Escapades: Arundati shares ten favorite dishes that have graced her blog, table and parties, including homemade truffles and chocolates, and a gorgeous date and fig ravioli.

Finger Licking Food: Namratha reveals that her passion for food is a new found one, and that is hard to believe once you look at her delicious list of 10 favorite recipes, including the all-time favorite, black forest cake.

Food Hunter's Guide to Cuisine: The Food Hunter chose to recap the top 5 new foods of 2007. Click through to read this interesting list and see if you have tasted any of these foods.

Food, In The Main...: Shyam shares her five favorites of the year. I especially love the vegetarian Shepherd's Pie, which "sacrifices nothing - in taste or farmyard animals" :D

For The Cook In Me: Nags takes an interesting and introspective look at the highlights of the blogging year, including her most popular post, her most fun post, and the one that surprised her the most. Go see for yourself what they are!

Fun and Food: Mansi muses over everything that went into the making of her blog, then shares her favorite recipes from several different categories, including one that is perfect for the season: a Hot and Spiced Vanilla Rum Drink.

Green Gourmet Giraffe: Johanna writes about the most memorable food moments of the year, including the creation of an adorable (and vegetarian!) hog's head.

Habeas Brulee: Danielle thinks back to every month of 2007 and relives some of the best moments- culinary ones, as well as big happenings in her personal and professional life.

Hunger Pangs: Rajitha pens (types?) down her thoughts on why she enjoys food blogging, and gives her top 5 recipes based on a unique criterion- "coz i thought photos looked good with minimal effort" :D Click through to see for yourself that these photos and recipes do look completely delicious!

Indian Cooking: Sagari is a new blogger who looks back on the start of her blog and picks out five delicious favorites. We wish you good luck for a whole new year of cooking and blogging.

Indian Food Rocks: Manisha looks over the year one month at a time and shares the highlights- be they food, family or life in general. Click through to take a look at a memorable year of incredible posts.

In Love With Food: Bindiya proclaims "BLOGGING SIMPLY ROCKS" (we agree!) and shares 7 of her favorite dishes this year- 2 rich curries and a whole array of tempting desserts.

Iron Stef: Stef recollects the most memorable posts of the year all in once place to make one quirky, wonderful post containing everything from bright pink gnocchi, adorable-looking savory meatloaf cupcakes and a zucchini the size of a toddler, among other delights.

Jugalbandi: Bee and Jai write about their favorite posts from the diverse series on their blog, and each pick five of their favorite recipes from this year. Click through to get a bird's eye view of this incredibly wide-ranging blog.

Kalyn's Kitchen: Kalyn chooses a favorite recipe from each month, like roasted asparagus in February and spiced butternut squash in November. Each of these dishes is healthful, flavorful, seasonal and oh-so-colorful: a winning combination.

Kitchen Art: Shella writes a heartfelt tribute to each of her family members and friends for being avid supporters of her blog. Click through to read about her prize-winning chocolate recipe.

Live To Eat: Sig looks back at the best posts from all the myriad categories of her blog- including desserts, cocktails and restaurant reviews. That Kumquat and Mango Mojito is calling out to me, but wait, it is only 7 in the morning :D

Mane Adige: Ramya's flashback is a short and sweet list of the 5 best pictures on her blog and the 5 recipes that her readers have appreciated the most.

Maninas: Food Matters: Maninas summarizes the best recipe of the year in 4 words- "INSPIRATION, BOLD FLAVOURS, DISCOVERIES, EXPERIMENTATION" what more can one ask for?

My Randap: Seema takes a fond look at her blog and chooses the favorite recipes that run the gamut from the very traditional (sanna polo) to the very modern (fruit pizza). Click through to see the whole list.

Nalapaka: Vanamala reminisces about the happy family moments of the year gone by and lists her favorite dishes of the year and of each month, all wrapped into an appetizing feast.

Out Of The Garden: Linda bids a fond farewell to 2007 and finds that the year has been more than a foodie-journey for her. Click through to see her highlights of the year and gorgeous pictures of good times on her blog.

Passionate About Baking: The Passionate Baker treats us to a eye-popping collage of her year's creations, then shares many of the favorites of 2007- including her favorite discoveries this year ("BLOGGING & new friends" is at the top of the list!)

Ra Cha Chow: Tracy's post reveals a lot of her year's favorites- recipe, TV show, product and website, plus a sneak peek into exciting things to come in 2008. Her favorite product is one of my favorite new discoveries of the year too.

Saffron Trail: Nandita rounds up all the recipes blogged in 2007, and shares her personal favorites- from a zero-oil vegetable dish to a strawberry cheesecake that resulted in "an extra inch on our waist" :D

Simple Indian Food: EC shares the ten recipes of the year that were super-hits, as well as some great resolutions for the coming year. Click through to see if any of your own favorites made it to the list.

Siri's Corner: Siri fondly remembers the favorite moments of 2007, including 15 days of NaBloPoMo and participation in the FAHC campaign.

Spicy Chilly: Bharathy presents her top ten recipes, including one of my all-time favorite snacks- raw banana chips.

Sunita's World: Sunita speaks fondly of the blog as her "third baby" and highlights some of her delicious creations of the year, as well as her wonderful monthly event Think Spice.

Swad: As she bids farewell to 2007, Swapna also says good-bye to her kitchen as she prepares to a brand new home in India. Go read her fond memories of setting up home and hearth and the memorable recipes that were lovingly prepared there.

Tastes Like Home: Cynthia recollects “A year in the kitchen”, full of activity and yielding incredible results. Click through to her column to read a concise account of her numerous and diverse culinary adventures in 2007.

Teczcape: Tigerfish sews together a collage of time-saving dishes for busy cooks everywhere- 10 one-dish favorites that definitely meet the stated goal of "Quick. Easy. Healthy. Nutritious." Now is the time to get some fresh dinner ideas for the new year.

Tham Jiak: Rokh looks back at a year of delicious eats and highlights "best idea thought of in 2007" and "best celebration" along with favorite recipe and restaurant, all packed into one engaging post.

The Bubbling Cauldron: Kamini polls her family to find the best dish of 2007, then reveals a few more dishes that are her own favorites. Take a guess- what could the family favorite be; then check if you are right!

The Perfect Pantry: Lydia divulges some pantry ingredients that stood out during this year, then gives us a sneak peek into 10 exciting new ingredients that just might make their way into the perfect pantry in 2008. Click through to look at the list, then suggest some of your own favorite ingredients to Lydia.

The Singing Chef: Raaga writes an interesting account of her culinary journey and reveals a lot of the year's favorites, including the ingredient of the year and the discovery of the year. Curious about what they are? Go see for yourself.

What Smells So Good: Sarah's list includes her own favorite posts, favorite posts from other blogs, as well as a delicious list of recipes that she plans to make in the coming year. Click through to get some more to-do dishes for your own list, because everything on Sarah's list sounds really good.

What's For Lunch, Honey?: Meeta's retrospective includes her favorite moments from each aspect of her blog, including Bollywood Cooking, Foodography and Daring Bakers, all depicted with her signature spectacular photographs.

When My Soup Came Alive: Sra writes a contemplative post about her year of blogging, letting us into what she wants her blog to do next year, then setting out her favorite posts...everything from recipes to commentaries to trips down memory lane, all bundled up in this candid and humorous post.

And finally,
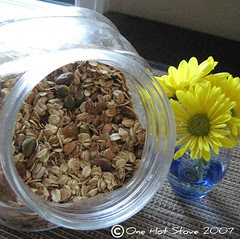
One Hot Stove: My ten favorite recipes of 2007.

Last but not least, here is a Blog Reader Challenge: Go visit the food blogs that you read and love, and tell them what *your favorite post* of the year was, on that particular blog. Perhaps there was the one write-up that really struck a chord, a post that was useful or informative, or a recipe that you tried and loved. Half the joy of blogging comes from the conversation between bloggers and readers, so tell us what your own favorite posts were.

There is always a possibility that some entries are lost in cyberspace, so if you don't see your entry here, please e-mail me and I will include it right away.

Many thanks to all the participants and all the readers. Here's wishing you a beautiful dawn tomorrow as a new year begins in our lives.

Wednesday, December 26, 2007

And Time Goes By...

You've been a good year, 2007. A new city and a new kitchen yielded 120 posts on One Hot Stove during this year. It was *really* hard to choose my favorite 10 recipes of 2007. I rarely post a recipe here unless I've enjoyed it very much- so the "deliciousness" criterion really is of no use here. In the end, I have featured the recipes that have the highest "keeper recipe" score. After all, the life of a food blogger is a constant quest for the next recipe to cook and eat and blog about. The keeper recipes are the ones I keep coming back to, ignoring the urge to look for something new and different.
BestOf2007

So here they are: My Top 10 Recipes of 2007, in no particular order, with notes about the highly subjective reasons I chose to include them.

1. Microwave Sabudana Khichdi
khich6

This is our breakfast when I am feeling indulgent. I left the old skool stove top method behind this year and switched to the microwave. As several comments on that post will tell you, it just works really well! I took the advice of some readers and started soaking the sabudana for only 15-20 minutes, then draining and laying it out for 1-2 hours. The resulting khichdi is simply perfect (which can be a miracle when it comes to sago khichdi). For being able to standardize and simplify a favorite dish, this post makes it to the list.

2. Granola
granola2

This is a great example of how a blog event will push me to try something that has been idling on the to-do list for a while. Madhuli's "Oats" theme got me to start making granola at home on a regular basis. Within a few months, I had abandoned the usual recipe and switched to a new favorite no-oil granola recipe. I now make it every couple of weeks with a different combination of nuts and sugars and dried fruits and store in the jar for the easiest breakfast ever. For saving me calories, time and $$, this post makes it to the list.

3. Summer Rolls
roll5

Lots of salad vegetables, herbs and grilled tofu all wrapped up in a neat bundle and dipped into a mouth-watering sauce. What else can I say? These summer rolls are bursting with health and are perfect for lunch-boxes, taking on trips and picnics, as crowd-pleasing appetizers. For being incredibly versatile, these rolls make it to the list.

4. Kati roll
KatiRoll2

My love for street food is no secret. I won't say that I buy/make paneer often, but when I do, this kati roll is what we crave. After some experimentation, I hit upon this recipe that hits the spot. For satisfying my street food cravings, this post makes it to the list.

5. Pizza
piz3

My idea of the perfect Friday night, when we are quite tired from a hectic week and ready for the weekend: pizza and a glass of wine. Up until last December, we picked up the phone and ordered one from the neighborhood pizzeria in NYC. Something tells me that it is going to be difficult to find decent pizza in St. Louis. Now I make my own and feel a lot more empowered :D For reducing my NYC homesickness, home-made pizza makes it to the list.

6. Falafel
falafel

To be fair, this is a combination of the two above foods: a street food and a NYC staple. This recipe for falafel is always a big hit whever I make it, and it led me to explore other delicious recipes based in Middle Eastern cuisine, such as lubia polo, hummus and kibbeh. For inspiring me to explore new cuisines, this post makes it to the list.

7. Mustard greens
Greens5

This recipe, along with this one, was significant to me for one reason: it taught me that a few select flavorings are the best way to make the main ingredient shine. I think this is going to be my next endeavor to improve my cooking skills: to think carefully about the ingredients in a dish and ask if each one of them really has to be there. What does each ingredient contribute to the dish? For provoking me to think about the "less is more" principle of cooking, this recipe makes it to the list. And also because I have used it to make countless bowls of delicious greens to nourish us with.

8. Vegetable Biryani
biryani1

This is just a standardized way of making vegetable biryani in a way that makes way more servings than I am normally accustomed to making. I grew up eating this biryani for Sunday lunch and it is just really special to me. For being a sure-fire way of feeding a crowd, this post makes it to the list.

9. Chocolate Cake
bcake1

Three days after I made this cake, some of the trimmings (from making the layers) were still in my fridge. When friends stopped by with chocolate cupcakes from a trendy local bakery, V and I did a quick taste test- this stale cake versus the fresh cupcake. No contest; this cake was far tastier even when it was three days old. For giving me a classic reliable chocolate cake recipe, this post makes it to the top ten. I can't wait to use it to make a Black Forest Cake, with home-made cherry filling.

10. Buttercrunch Candy
bccandy1

This year gave me a bounty of gifts from the kitchens of family and friends- fruitcake and cookies (thanks, Madhu), biscotti (thanks, Rebecca), plum chutney (thanks, Mark), peach jam (thanks, Terry kaku)...to name a few. With this candy recipe, I now have a go-to recipe for making my own favorite treat to give as a gift. For being a wonderful gift from the kitchen, this post makes it to the list. And also because it was quite a big deal for me to get over some hesitation and learn to make candy at home.

Other highlights of this year for me were: the A to Z of Indian Vegetables series/event that just kept me on my toes for a few months. This year, I am going to go back and try cooking some of those delicious vegetable dishes that were sent in for that event. It was incredibly enjoyable writing those posts. I also thoroughly enjoyed hosting RCI: Maharashtra and writing that massive round-up. Hosting events, and participating in events remains one of my favorite blogging activities :D This year, I also started writing a monthly post for the Daily Tiffin (Thank you for the opportunity, Meeta). It has been fun to write about topics that are not as food-centric as the ones on this blog.

Every home cook has different aspirations- one might want to learn to make spectacular dishes for entertaining, and another might want to focus on lower-calorie cooking. I have realized this year that my goal is to put a tasty and nutritious dinner on the table day after day after day. To a large extent, I feel good about what I have managed to go this year: make vegetable-centric dinners, to rely on pantry staples, minimize waste and to keep a wide repertoire of simple, one-dish meal ideas on hand. Next year I want to do more of the same. I want to increase the presence of vegetables, beans and whole grains in our everyday meals, and still devote some time to making foods such as desserts and deep-fried foods that may not necessarily be the pinnacle of healthfulness but are meant to be enjoyed once in a while to mark special times. I enjoyed the pilot run of "project of the month" and the "flavor of the month" in December (hope you did too) and plan to continue those on a monthly basis.

I can't thank *you*- the readers of this blog- enough. Your feedback, and suggestions and encouraging comments, help me grow and strive to do better. If there is anything specific you would like to see on One Hot Stove, I am all ears. When someone leaves feedback about a recipe- whether it worked or not, what variations they tried- it helps everyone who wants to try that recipe in the future. To all those who take the time to share their thoughts, please know that you are appreciated.

Any food bloggers who would like to write their own Best of 2007 are invited to send me the permalink of their post by December 30th for inclusion in the round-up.

To all my dear fellow bloggers, readers, friends, family and well-wishers- I wish you every joy and success in the year 2008. And for all of us, I wish for a world that is peaceful and just, with nutritious food to fill every tummy.
phataka

Happy New Year!

Sunday, December 23, 2007

Two Tangy Milky Desserts

...one Maharashtrian favorite, and the other, an American favorite.

The first is Shrikhand, a simple dessert of strained thick yogurt mixed with sugar and flavorings like saffron and cardamom. I must confess that of all the profusion of Indian desserts that I know and love, shrikhand would never make it to even the top 20. I usually find it too thick and rich and cloying after a few bites. But I was making a typical Maharashtrian meal for some friends last night and decided to give it a try. After all is said and done, it *is* a low-maintenance no-cook dessert and when you make it at home, you have full control over how much sugar you add to it.

I got this recipe from an aunt (actually one of my parents' closest friends). She belongs to that band of Indians who settled in the US in the 70s, in the days when Indian ingredients and stores were few and far between in this country. Over the decades, she has tried and tested and perfected (and how!) ways of making Indian favorites using ingredients commonly found in American supermarkets. When she informally told me how she makes shrikhand, I tuned out everything else and filed away the instructions carefully in the voice recorder of my brain. When you collect recipes as I do, you quickly learn to memorize every detail when an accomplished cook is talking. Virtually every shrikhand recipe that I come across mentions that it is essential to use full-fat yogurt. According to my aunt, *low-fat* yogurt yields the best shrikhand (full fat is too buttery and non-fat is too chalky, as per her trials). Now, this is not someone who would ever compromise taste for the sake of low-fat anything, so when she says that low-fat tastes the best, I am convinced. She also mentioned that she prefers Dannon brand yogurt. I used Trader Joe's and it worked just fine. The taste of this shrikhand was so irresistible that I felt absolutely no need to add sour cream or anything else to it, as some recipes do. Thank you, Anju maushi, for sharing your recipe!

Shrikhand

SKand
(serves 4-6)
Ingredients
1 tub (32 oz/ 4 C) low-fat plain yogurt
3/4 C granulated sugar (anywhere from half to one cup, according to taste)
pinch of salt
1/2 t powdered cardamom
1 t warm milk
1 hefty pinch saffron threads
2-3 T chopped almonds or pistachios
Method
1. Set a large strainer on a bowl. Line the strainer with clean porous fabric (eg. cheesecloth) or clean coffee filters. Pour the yogurt into the strainer. Cover the strainer/bowl and place in refrigerator overnight (8-12 hours).
2. Place the thick, strained yogurt into a fresh bowl. The nutritious whey that has dripped away can be used to knead paratha/roti dough, in dals or soups.
3. Add the sugar 2-3 T at a time, stirring every time you add some, at 3-5 minute intervals. This way the sugar dissolves evenly into the yogurt.
4. Meanwhile, stir the saffron into the warm milk and let it soak for 5-10 minutes.
5. Finally, after all the sugar has been mixed in, add a pinch of salt, saffron, cardamom and nuts. Stir and refrigerate until you serve it.

This shrikhand was delicious, and might be worth a try for those who think they don't like shrikhand much. Low-fat, schmo-fat...it was utterly creamy with just the right consistency, to my palate. And far less indulgent than most other desserts I can think of. Other delicious additions to shrikhand are nutmeg powder and charoli. At feasts in Maharashtra, shrikhand is often the accompaniment to puri-bhaji.

Fruity takes on shrikhand:
Strawberry Shrikhand from Ashwini
Blackberry Shrikhand from Manisha
Peach-Saffron Shrikhand from Suma
Amrakhand from Aarti
There is such a thing as "chocokhand" (chocolate shrikhand) sold as a novelty by some Indian dairies, but it looks like no blogger has tried making that yet :D

Strained yogurt is such a versatile ingredient. Among other things, it can be used to make sandwiches, frozen yogurt, tzatziki, and delicious dips.

*** *** ***

There are so many parties and get-togethers this month that an over-abundance of desserts is almost inevitable. I swear I am making these sweets to take to holiday festivities and to share with lots of people and restricting myself to itty-bitty servings (that's not what her hips are saying). To continue with the sugar high, here is the other dessert I made this week: Lemon Squares.

I saw Key Lime bars being made on an episode of America's Test Kitchen on PBS and they looked irresistible- a sweet cookie crust baked with a sweet and tangy custard filling made quite simply with citrus juice and sweetened condensed milk. I used lemon instead of lime because it is what I had on hand. I also could not find animal crackers in the store so I subbed something called Teddy Graham Honey crackers. Sorry, cute little teddies who got blitzed to crumbs in the food processor :( I loved the graham cracker crust here, so I will continue to use it instead of the animal crackers.

Lemon Squares

LemBar
(adapted from this Cook's Illustrated recipe)
1. Prepare a 8X8 inch square baking pan by lining it with foil (with some overhang) and lightly oiling the pan.
2. Preheat the oven to 325F
3. Crust: In a food processor bowl, add 5 oz. honey graham crackers, pinch of salt, 3 T melted butter, 3 T sugar and a dollop of molasses. Pulse until the mixture resembles breadcrumbs. Pour it into the prepared pan and pat it down evenly (I used the bottom of a glass).
4. Bake the crust for about 20 minutes. Remove from oven and cool for 20 minutes.
5. Meanwhile, make the filling: In a bowl, mix 1 14 oz. can sweetened condensed milk, 2 oz. cream cheese (1/4 of the standard pack), 1 egg yolk, pinch of salt, 1/2 C fresh lemon juice and 1 T lemon zest.
6. Pour the filling into the bakes crust and bake for 20 minutes. Cool for an hour, then chill thoroughly before slicing into 16 squares.

This dessert is really fun to make, for some reason. And tastes divine. These people agree.

To all my friends who celebrate it, here's wishing you a Merry Christmas!

Thursday, December 20, 2007

A first attempt at Peanut Chikki

Rich roasted peanuts trapped in a shell of complex (salty-sweet, caramel, smoky) notes- peanut brittle or peanut chikki is my all-time favorite candy. I first tried making chikki when I was still in middle school. I only remember that the episode was a messy one, and now, many many years later, it is time to give it another shot.

Although chikki can be made with refined white sugar, it is more commonly made with that flavorful brown sugar that Indians know as jaggery or gud or gool. Jyotsna's essay All About Gur Things is a beautiful look at the art of making jaggery- my favorite sugar in the whole wide world. In his book On Food And Cooking, Harold McGee explains that brown sugars are sucrose crystals that are coated with a layer of dark syrup from one of the stages of sugar refining. It is the syrup that gives brown sugar a more complex taste than the one-dimensional sweetness of sugar. The supermarket variety of brown sugar is simply ordinary refined sugar coated with a thin film of syrup. Once I knew this, I stopped stocking my pantry with brown sugar altogether. Now I simply mix regular sugar with molasses to make up brown sugar whenever it is called for in recipes. Unlike the fake supermarket brown sugar, jaggery is described by McGee as a whole sugar, crystalline sugar still enveloped in the cooked cane syrup that it emerged from.

Many of us from Western India probably associate chikki with a popular vacation destination called Lonavla. This hill-station is a cool refuge from the blistering heat of the plains and I remember taking many trips there with my family. I think it is almost illegal to visit Lonavla without trying one of the dozens of different kinds of chikki sold there; and if you want to maintain your social life, it is necessary to buy several little string-wrapped boxes for friends and neighbors and co-workers as well. Abodh's essay on Chikki at Lonavla tells you "everything you wanted to know about the Lonavala chikki and didn't know whom to ask"! (This blog has some great little essays and pictures about life in Bombay, like this one about Bhaji Galli or vegetable lane, plus Abodh rescues stray dogs from the streets of Bombay. What a great cause).

Looking through various recipes, I could see that chikki is a pretty minimalist food that calls for, basically, sugar and peanuts. The sugar can be white sugar or jaggery or a combination of the two. I chose all-jaggery. The peanuts can be roasted or not. They can be crushed or not. I chose to roast and skin the peanuts, and chopped half of them and left the others whole (or in halves, actually). Some recipes add some ghee, others don't. I did add some. Some recipes add cardamom and some don't. Again, I chose to add a little bit. The final variable is the ratio of peanuts to jaggery. For the first pass, I decided to go with a 1:1 ratio. The ratio would really depend on individual preference. For breaking up large lumps/slabs/mounds/dheps of jaggery, Anupama's tip is an excellent one. The recipe describes how I made chikki this time, followed by notes on what I would change the next time I make it.

Peanut Chikki

peanChikki

1. Roast 1.5 C peanuts in either a skillet or microwave. Skin the peanuts and coarsely chop half of them. Set the peanuts aside.
2. Lightly grease a baking sheet (or some other flat surface) and keep it ready.
3. In a medium-sized heavy saucepan, add 1.5 C chopped jaggery and 1 T ghee. Heat on medium-low heat until the jaggery starts to melt.
4. When the jaggery melts and the syrup starts to form threads that snap when cooled, take it off the heat. My idea was to heat the jaggery syrup to 300F (hard crack stage that is best for brittle). But around 250-260F, the syrup was getting too dark, clearly forming threads and had to be taken off the heat before it scorched. This is most likely due to the fact that jaggery has different caramelization properties as compared to pure sugar. I think.
5. Off the heat, add peanuts, a pinch of cardamom, mix well and pour onto the greased surface. Spread into a sheet using a spatula.
6. Break into pieces once it is cooled. Store in an air-tight container.

Lessons learnt:
1. I will coarsely chop all of the peanuts to meld the taste of nut and jaggery in every bite.
2. I will use more jaggery than peanut- about 2 C jaggery for every 1.5 C peanuts.
3. I have to standardize the temperature at which jaggery forms a brittle.
Perfect or not, this chikki was crunchy and thoroughly enjoyable!

Love your chikki? Adore that brittle? Here's more:
Peanut Chikki from Chachi's Kitchen
Peanut Chikki from Vindu
Coconut Chikki from A Whirl of Aromas
Dry-fruits Sesame Chikki from Cooking Pleasures
Til Wadi from A Cook @ Heart
Video: Peanut Brittle from Mark Bittman
Cashew Brittle from The Wednesday Chef
Popcorn Brittle from Culinary in the Country

I'm going to make another dessert tonight, and if it works out, I'll post about it. The two main ingredients are lemon juice and condensed milk. Care to guess what it is?

Wednesday, December 19, 2007

Miso as Marinade

After enjoying miso in a steaming cup of soup, here is another great cold-weather way of enjoying it: as a phenomenally flavorful marinade for tofu and grilled vegetables.

Anh's recipe caught my eye a few months ago. Two flavor powerhouses- tahini (sesame seed paste) and miso come together to make a rich marinade that is slathered on thick cuts of eggplant and tofu. Under the broiler, the tofu and vegetables are grilled to perfection.

I feel very sheepish admitting it here, but I only "discovered" the broiler a couple of months ago. Standard oven ranges that are found in the majority of US kitchens come with an oven. Although I will probably always be much more comfortable with stove-top cooking, it did not take me very long to start using the oven frequently. In all homes that I have lived in up to this point, the oven also has a mysterious little door at the very bottom- the broiler. Turning the oven to its "broil" function starts up a roaring fire close to the broiler. Any food that is placed in the broiler gets quickly cooked by infrared radiation and gets nicely browned to a crisp finish (and nicely charred to a lump of carbon if you turn your attention away for a few minutes).

Anyway, it has taken me years to "discover" the broiler and to start using it and enjoying it. It all sounds so silly, and I felt downright foolish until I found that she also discovered the broiler only recently. Now I feel a little better :) Anyway, knowing how to broil opens up lots of possibilities for turning out perfectly browned vegetables, melting crusty cheese, creme brulee with the crackly crust and all the rest of that.

Back to the recipe at hand. I mixed together the marinade without actually measuring out any of the ingredients; just eyeballing them. I also did not use skewers but will do so next time I make this- they do make for such a pretty presentation. Thicker slices of eggplant taste very juicy and delicious.

Miso-Slathered Tofu and Eggplant

misotofu1
(Adapted from Anh's recipe )
1. Take one medium eggplant and slice it into thick slices. Drain 1 box of extra-firm tofu and cut it into thick slabs. Pat the slabs to wick off as much liquid as possible.
2. In a small saucepan, combine tahini, white miso, sugar, rice wine vinegar, red pepper flakes and vegetable stock (all to taste) to make a thick paste. Warm the sauce until the ingredients blend together well. Set aside.
3. Lightly grease a broiler-safe pan and turn on the broiler. Lay the slices of eggplant in a single layer. Smear each slice with the marinade and sprinkle with sesame seeds. Broil for 5 minutes or so, until the top is starting to brown. Turn over, smear again with marinade and broil until tender.
4. Broil the tofu the same way, although tofu takes slightly less time.
5. Serve right away!

I served the broiled tofu and eggplant with some fried rice made with brown rice, for a delicious and wholesome meal. Each bite of the luscious tofu and eggplant brings home the meaning of the word "umami".
misotofu2


Other ideas for cooking tofu with miso:

My friend Kamini recommends this Miso Baked Tofu recipe.

Skillet Seared Tofu with Miso Sauce- Deborah Madison's recipe shared on "Albion Cooks".

This Nobu style Tofu with Miso Sauce sounds delicious too.

***Two Quick Reminders***

Last call for the Menu for Hope 4- Go grab those awesome prizes by buying raffle tickets here (and share a nutritious meal with a little schoolchild in the bargain).

Best of 2007: All food bloggers are invited to showcase the year of food on their blog. The deadline for the event is December 30th.

(My attempt at) A sweet and crunchy treat will be coming up in a couple of days. See you then!

Sunday, December 16, 2007

A Snowy Weekend

It is a snowy weekend here in St. Louis, and in most of the US actually. It has liberated us from the usual weekend chores like food shopping and given us permission to huddle in and do nothing in particular. Dog-walking is the one chore that must go on regardless of the weather- in fact, the streets are quite deserted except for the parade of shivering humans trying to stay warm while their frisky dogs run around in fur coats. Like his buddies, Dale is quite nonchalant about the snow. Here he is, giving us the, "What are y'all waiting for? Let's play" look:
dalesnow4

Paw-prints in the snows of time?
dalesnow2

Dale can provide comic relief even in the bleakest of weather. At one point, he got tired and sat down in the snow, only to spring back up with this expression :D
dalesnow3

Ready to walk home and warm up by the radiator:
dalesnow1


Last night, we were all set to walk down to our neighborhood chocolatier to get a cup of cocoa when the snow started coming down in full force. One look at the whiteout and I decided to make some hot chocolate at home instead. Normally, I just use cocoa powder, sugar and milk to whip up a simple cup, but I had a tiny bit of cream and a chocolate bar on hand and decided to make it a bit decadent. The addition of chocolate ganache really makes hot chocolate dreamily thick and sinfully delicious. It reminded us of our favorite hot chocolate from the City Bakery in Manhattan (although that stuff should be called chocolate bisque or chowder; that's how thick it is). It would be fun to try and replicate some of the flavors from their Hot Chocolate festival.

Please make every effort to buy fair-trade chocolate and cocoa. Chocolate tastes so much better when exploitation is not one of the ingredients.

Hot Chocolate

choco

1. Place 4 squares of bittersweet chocolate in a bowl.
2. In a small saucepan, heat 3-4 T heavy cream until it is near-boiling, then pour it over the chocolate pieces. Let the chocolate melt, then whisk the cream and melted chocolate together.
3. In the same saucepan, heat 1.5 C milk along with 2-3 t sugar (or to taste), a pinch of salt, 1 T cocoa powder and a cinnamon stick. Boil the mixture briefly and turn off the heat. Stir in the chocolate ganache and 1 t vanilla extract. Strain the hot chocolate into 2 cups and serve hot.

I can't believe there have been three chocolate recipes on this blog this month! Call it winter madness. I am sending this steaming hot chocolate to Deepz who is hosting JFI: Chocolate this month. Now that promises to be one sweet round-up!

*** *** *** *** ***

I've been peeking into some of my favorite blogs and trying some new recipes from them. While I did not remember to take any pictures, I could not resist sharing the links with you:

1. Khara Buns from Shilpa: It started when the Daring Bakers took on Tender Potato Bread as their challenge this month. The King Arthur Flour Baker's Companion, a veritable textbook of baking, says that many traditional American bread recipes called for using cooked potato or potato water (the cloudy water left over from cooking potatoes) as an ingredient in the dough. This practice started before baker's yeast was commercially available, and the starch content of potato and potato water served to attract wild yeast from the air and provide them a nutritious buffet while the bugs went to work. The starch also keeps the baked bread moist by hanging on to water due to its hygroscopic nature. Today, even though we pour out yeast from handy little sachets, the starchy potato does help to feed the ravenous yeast and results in moist tender bread. Anyway, I watched wide-eyed as the foccacias, loaves and rolls were displayed on the Daring Baker blogs this month, but did not seriously think of trying out the recipe because it makes a *huge* batch. Then Shilpa came along and solved the problem for me: her khara (savory) buns use a scaled down version of the recipe that is just perfect for a small family, AND she converted the basic recipe into irresistible stuffed buns- the stuffing is the spicy onion filling that many of us love from bakeries in India. While no one in their right mind would call me either daring or a baker, I succumbed to the lure of the stuffed buns and tried the recipe. Shilpa gives detailed and precise instructions and I followed them as I closely as I could. I did add some peas and carrots to the filling to make it more substantial. The dough turned out to be the stickiest dough I have ever encountered. Part of it is that potato dough is sticky by nature and perhaps I aggravated it by using a little too much potato (2 small potatoes instead of a medium one) and water that was slightly more than 3/4 C. But by generously flouring my hands, I was able to manipulate the dough quite easily. It rose beautifully, and I turned it into 6 filled buns, served with a big bowl of tomato soup. This bread is unbelievable- the outside was crunchy and crisp and the inside was fluffy and soft. Every bite was a treat! Leftover buns reheat very well: I popped them into the toaster oven for 10 minutes the next day and they were crispy and delicious all over again. This potato bread is a keeper: next time, I will be using it to make pizza crusts.
snow2


2. Palak Kadhi from Musical: snowy, stormy weather simply screams out for the comfort of steamed rice with some kadhi, what could be loosely described as a curry that is often based on chickpea flour and buttermilk. Musical never fails to amaze me with her simple and flavorful fare, and this kadhi is no exception- it comes together in minutes, includes a healthy dose of greens, and feeds the body and soul all at once. The most delightful moment of making this kadhi came when I had tipped the four whole seeds (coriander, cumin, nigella and fenugreek) into hot oil along with the onions. At this moment, the aroma that wafted up was *exactly* and unmistakably what I associate with good Punjabi restaurants. Heavenly! I made the kadhi with frozen chopped spinach, being unable to go to the Farmers' market due to the storm, and it worked just fine. I think this kadhi is going to be a staple in our home all winter long.
snow1


3. Methi Mushroom Curry from Nandita: This is one recipe for those times when you are craving Indian restaurant-style curries. Kasuri methi is one ingredient that can really take home cooking to the next level with its unmistakable taste and aroma, in my humble opinion. Here, it is cooked with some juicy mushrooms and a thick onion-tomato gravy that is finished with some yogurt-besan paste to get it to just the right level of creaminess sans the cream. My minor changes to the recipe: I did not add mustard seeds to the tempering. I used more onions and tomatoes to make more of a curry for the dish. And I added a dash of my mom's magic masala (cloves, cinnamon, cardamom) at the end of cooking. This is absolutely delicious!

*** *** *** *** ***

My Daily Tiffin column for December: It's a Wrap.

Have a great week ahead!

Wednesday, December 12, 2007

Candy is Dandy...

...especially when you make it with your own two hands! And if you manage to find a good recipe, it can be quicker than liquor ;) Some of my cooking projects turn out to be like governmental panchavarshik yojana (5-year plans)- grand plans that may or may not ever materialize. This whole idea of learning to make candy at home has been only two years in the making. 

It all started when Cathy came to tea bearing a box of toffee, the recipe for which she had learnt from David Lebovitz in a cooking class. Cathy claimed that this candy was very easy to make, but when Cathy says things like that, I don't believe her for a second. This is a person who makes adorable felted bunnies and spins tea towels from scratch. She recently finished baking her way through an entire cookbook, bringing a new cookie in to her workplace nearly every Monday for 3 years. In short, Cathy is not your average person...not by a long shot. Turns out that she was not kidding about the candy, however. 

Soon after I tasted Cathy's candy, in an incredible stroke of luck, David Lebovitz posted that candy recipe on his blog, with a wonderful detailed post for wannabe candy-makers (read it carefully-twice-before attempting this candy). Apart from ingredients like sugar, butter, nuts and chocolate, the only investment this recipe needs is a candy thermometer to measure the temperature of the syrup and determine when it has been cooked to the right stage. 

What is candy? Cooked sugar, essentially. The simple things are always the most deceptive; candy-making is sheer physical chemistry, and pages 680-693 of Harold McGee's On Food and Cooking provide a fascinating glimpse into the science of candy (the number of pages giving an idea of how much technicality there is to discuss). 

Is a candy thermometer essential? No. The time-honored method of cooling the syrup quickly (in a bowl of cold water) and testing the stage (soft ball/hard ball/soft crack/hard crack...no I did not make these names up) works just fine. But a candy thermometer makes life a lot easier for the less experienced cook like me- having to judge the balls of syrup and making up your mind about the stage of the syrup while the rest of it is still boiling away can be stressful. I bought a sturdy-looking analog Pyrex candy thermometer for 8$ and it is well worth it.

(Note added in 2020: I am still using this very same candy thermometer and it is very useful for making yogurt at home, in addition to candy.)
 

Choco-Nut Buttercrunch Toffee

bccandy1
(adapted from David Lebovitz's recipe) 

1. Coarsely chop 2 C toasted nuts. I used pecans and almonds and chopped them in the food processor. For the next batch I will use 1.5 C nuts, use only almonds and chop them by hand; the food processor resulted in some nut powder and nut pieces that were quite uneven. 

 2. Lightly grease a 8x10 inch (or so) rectangle on a baking sheet. Spread half the chopped nuts on the sheet and leave the other half aside. 

 3. Chop 5 oz fair-trade bittersweet chocolate and set it aside. 

 4. Also place nearby coarse salt crystals (for sprinkling), 1/4 t baking soda and 1 t vanilla extract

5. In a medium heavy saucepan fitted with a candy thermometer, combine 1 stick (1/2 C) butter cut into small pieces, 1 1/4 C sugar, a dollop of molasses, a hefty pinch of salt and 2 T water

Heat with minimum or no stirring until the temperature reads 300F (hard crack stage). This took perhaps 10-15 minutes, and the syrup was at a great boil by that time, although it thankfully did not boil over the sides of the pan. 

6. Once the temp is reached, take syrup off the heat, stir in vanilla and baking soda and pour it all over the nuts on the baking sheet. I was thrilled that the syrup flowed very well and spread itself quite nicely. 

 7. Scatter the chocolate bits all over the syrup. Let them melt for a couple of minutes and then spread the chocolate all over with a table knife or spatula. 

 8. Sprinkle with coarse salt and the remaining nuts. Press the nuts in gently so that they will set into the chocolate. Let it cool down. After 1.5 hours, the chocolate had still not set so I put the sheet in the refrigerator for 15 minutes to help it along. Refrigerating the candy to set the chocolate was a bad idea because it caused the chocolate to look dull and "bloom". Just let the candy set at room temperature for several hours, even overnight (cover it) until the chocolate sets. 

The sheet of toffee can now be broken into bite-size pieces quite easily. 

Verdict: What can I say? This is some drop-dead amazing candy. It tastes exactly like the stuff that you buy for exorbitant sums of money from glassed-in confection palaces. If you like butterscotch, and if you were a fan of Cadbury's "nutties" with that irresistible center, this candy is for you. This candy is addictive. You have been duly warned. I owe you, Mr. Lebovitz. 

Next stop in Candyland: peanut chikki as soon as I can hack the dhep (mound) of jaggery into manageable chunks. Stay tuned! 

bccandy2

Monday, December 10, 2007

Me So Therapeutic!

One of my favorite things about living in the United States is the accessibility of ingredients from all corners of the globe. If the home cook so wishes, their pantry can be stocked with everything from chipotle to capers, tahini to tamari. I am taking my own sweet time getting to know and love some of these seasonings- and the joy that comes from hearing a distinctly foreign word, then taking the plunge and bringing a container home, picking it up and turning it around in my hands a little fearfully (hoping that the mere act of holding it will give me clues about how best to use it); until one day, when a recipe using this strange new thing becomes a "keeper" and the ingredient is now an old friend and certified pantry staple.

Miso has long been one of those food-words that I kept coming across but never quite understood. Until SusanV wrote a post about Double Mushroom Miso Soup that said, "Eat Me" rather boldly. It was time to get to know miso a little better. Miso is a traditional Japanese ingredient; a fermented paste of soybeans and grains. Like other fermented foods like idli batter and sourdough starter, it has that peculiar "assertive-yet-not-unpleasant" aroma (or perhaps "funky-yet-good"). For me, there are two reasons to get to know miso: (a) it brings wonderful savory flavor to food (the deep and hearty taste called "umami") and (b) it is known for its healthful properties, including a rich variety of trace minerals and vitamins. Read more about miso here and here.

So I took the plunge- bought a small tub of unpasteurized white miso (shiro miso, the mildest kind there is). Miso can be found in Japanese and Asian stores and in health food stores. I bought mine from the refrigerated section of Whole Foods. Although it is white miso, in practice it looks more brown than white. The trademark recipe that uses miso is Miso Soup and this was the very first thing I wanted to make.

From what I have learnt from books and blogs, here is the simplest way to make miso soup:
1. Heat some stock: it could be the traditional Japanese dashi made with seaweed and fish flakes, or, for vegetarians, any flavorful vegetable or mushroom stock (or made with seaweed alone).
2. Add vegetables of choice (or other ingredients like tofu) and simmer until cooked.
3. Add miso paste: Take some miso paste in a small bowl. Add some of that hot stock and dilute the paste, then add it to the soup pot. Reheat briefly and your miso soup is ready!

One of my favorite cookbooks, Laurel's Kitchen, says that traditional Japanese miso soups are composed of one main vegetable and two garnishing vegetables. The garnishing vegetables can be interpreted to include anything like cubes of tofu or lemon zest. Any vegetables like greens, mushrooms, zucchini will work fine. Unfettered by tradition, miso soups, of course, can be as diverse as the cook is imaginative. Some cooked brown rice or noodles would make the miso soup even more filling.

Mushroom Miso Soup

MushMiso
(makes 3-4 servings)
1. Heat 4 C of your favorite vegetarian stock (I make mine from "Better than Bouillon" stock concentrate) until it is simmering.
2. Add 2 C mushroom slices and 3 minced scallions (white parts) and simmer until the mushrooms are tender.
3. Remove a small amount of the hot stock into a bowl. Add 2 t white miso paste and stir it in to blend. Add the diluted miso paste back into the soup. Reheat for a couple of minutes and serve hot, garnished with scallions (green parts).

This soup is such a treat during winter! A cup of steaming hot miso soup just feels very nourishing and is very effective in banishing the winter blahs. During the cold months, I always feel like reaching for a hot beverage. All too often, that beverage is something caffeinated like tea or coffee. Miso soup can be easily made in single-serving sizes as an alternative hot beverage. Miso does have a fairly high sodium content, so you might want to use lower-sodium stock or dilute the stock with some water.

Want more miso soup?

Maki writes a beautifully illustrated and instructive guide to Traditional Miso Soup, including ways to make vegetarian dashi.

Jaden presents an illustrated guide to 10-minute miso soup.

Kevin has a dozen different variations on miso soup on his blog, including this Tofu and Wakame Miso Soup.

Finally, Elizabeth Andoh's beautiful essay about Mama's Miso Soup

Before December is over, I hope to make 2-3 more miso recipes, exploring it in ways other than soup. If you have a favorite way of using miso, I sure would appreciate knowing about it.

*** *** *** Menu for Hope *** *** ***

From today until 21st December, you have the opportunity to participate in the annual foodbloggers' fund-raising event, the Menu for Hope 4. $10 buys you a raffle ticket for one of dozens of mind-boggling prizes (expensive ingredients, must-have books, homemade goodies and so much more)...there is something here for everyone! Every cent of the money goes to a worthy cause, while the prizes have been donated by generous bloggers. Consider buying tickets as an unusual and thoughtful holiday gift for the people you love, and a couple for yourself too. You never know what you will win! Click here for all the details. Thank you for your generous donations.

Friday, December 07, 2007

Chocolate Birthday Cake

bcake1

Birthday cake was the very first thing I learnt to make, and the very first recipe I knew by heart. My parents were big on homemade birthday cakes for their kids. At least two times a year (on the birthdays of my sister and myself), the big oven would get pulled out from the little storage room beneath the stairs and dusted off. Equal weights of eggs, butter (usually home-churned), sugar (powdered in the mixie) and flour (sifted with baking powder) were set out. Ritually, butter and sugar were creamed together with some vanilla essence. Beaten eggs and flour were added in tandem, a little at a time, until a thick and creamy batter emerged. The batter would get divided into two parts. One part got tutti frutti and chopped walnuts stirred into it, and the other got a few spoonfuls of cocoa powder. The two batters were dropped in random clumps into a cake pan lined with newspaper, and after a hour of baking, a random marbled cake emerged, with swirls of pale yellow and dark brown. Ocassionally, the birthday girl would request a more colorful cake, and then the batter would get divided into four, and two portions would get pink or green food coloring to result in a beautifully ribboned cake with swirls of pastel colors. This pound cake was an all-round favorite, and when I was in high school, my friends and I would bake the cake without supervision. Which is to say that I would bake, and everyone else would sit around and tell me to hurry up so that they could lick the spoons and bowls.

And this is why, to me, birthdays = birthday cake. There may be a party, or not. There may be presents, or not. But a homemade birthday cake made just for the birthday boy or girl is the stuff that is worth turning a year older for. Today, for V's birthday, here is what I made him: a layered chocolate cake with a raspberry filling and a ganache frosting.

The basic chocolate cake recipe came from The Art of Simple Food. In her book, Alice Waters gives several tips for turning out light and airy cakes, including-
1. Using cake flour for a more delicate result. Of course, if you live someplace where cake flour is not available, regular all-purpose flour (maida) can be used.
2. All ingredients should be at room temperature.
3. The first 5 minutes of baking are crucial, so it is important to have an oven that has been pre-heated for 10-15 minutes so that it is is properly warmed up.
4. Beating the sugar and butter together well to make an fluffy aerated mass.

Apart from the usual suspects- flour, butter, eggs, sugar and vanilla extract- this recipe calls for a double dose of chocolate- both cocoa powder and some melted chocolate in the batter. It also calls for some buttermilk. In Indian cuisine, buttermilk refers to either the liquid left over from churning butter, or to simple diluted yogurt. In the US, it refers to tangy thick cultured milk. One can buy liquid buttermilk in quart sizes but I recently took Lydia's advice and bought myself a tub of buttermilk powder. Now I can quickly make buttermilk as required. The most unusual (for me) "ingredient" in this cake is boiling water! Once the main ingredients have been mixed together, more than a cup of boiling water is added to make the batter. It feels downright bizarre to pour water into a cake batter. Unusual or not, it works.

This cake is moist, soft and absolutely chocolatey. I have been trying different recipes for chocolate cakes for several years, trying to find the one recipe that I really like and that I can use as my go-to chocolate cake recipe for making cupcakes, layer cakes and sheet cakes for all ocassions. I have found it!!!

Chocolate Cake

bcake3
(Adapted from The Art of Simple Food by Alice Waters)
Ingredients (all at room temperature)
4 oz bittersweet chocolate
1/2 C (1 stick) butter
1 1/2 C sugar
2 t vanilla extract
3 large eggs
1/2 C buttermilk
1 1/4 C boiling water
To be sifted together
2 C cake flour (or all-purpose flour)
6 T cocoa powder
2 t baking soda
1/2 t salt
Method
0. Preheat the oven to 350F. Butter two round 8-inch cake pans, cover the bottom with a circle of parchment paper, butter it lightly, and coat the pans lightly with cocoa or flour.
1. Melt the chocolate: chop it coarsely, then microwave for 30 second bursts, stirring after each burst. It took me only a minute, or less to get this amount of chocolate melted. This can also be done in a double boiler.
2. In a large bowl, beat the butter until creamy. Add sugar and vanilla, and beat very well for 5-10 minutes until very light and fluffy.
3. Beat in the eggs one at a time.
4. Stir in the melted chocolate.
5. Stir in half the dry mixture.
6. Stir in the buttermilk.
7. Stir in the rest of the dry mixture. At this point, the batter was so thick that it was more like a dough. Hang on.
8. Slowly, stir in the boiling water until it is just incorporated. Now you will have a smooth and glossy batter.
9. Pour the batter into the prepared pans and bake for 30-35 minutes or until a toothpick comes clean. Cool completely before frosting.

Frosting: The cake tastes wonderful just as it is, but adding some frosting is, well, the icing on the cake (apparently we need more metaphors for this phenomenon). Buttercream frosting does look beautiful on cakes, especially if you do some fancy piping. I can't stand to eat it, however, and decided to frost the cake with some ganache- cream and chocolate whisked together to a thick dreamy paste. One could also use plain sweetened whipped cream for this cake- it is chocolatey enough to stand up to that. For the ganache, chop 4 oz chocolate (bittersweet or milk chocolate or any combination of those). Heat 1/2 C heavy cream in a small saucepan nearly to boiling point, then pour it over the chocolate. Let it stand for 5 minutes, then whisk together. The 1:1 proportion of chocolate to cream is important because if you add too much cream, the result will be runny and not a frosting at all (been there, done that, won't be making that mistake again).

Filling: I love the combination of fruit and chocolate and decided on a classic raspberry filling for this cake. I used this raspberry filling recipe from Smitten Kitchen (halved the recipe, but in the end I needed only half of the halved recipe). Except that I was too lazy to strain the seeds out of the pureed raspberries and just left them in (apologizing mentally to the people who are going to eat this cake and will just have to deal with a mouthful of raspberry seeds). Next time, I will definitely strain the puree. Or just buy some raspberry preserves and use them instead.

Assembling the cake: First, I turned out the cooled cakes from the cake pans and gently used a knife to remove the "dome" of the cakes to make even layers. This is going to take me some practice but is not that difficult. An assembled layer cake is difficult to move around, and I found it easy to assemble the cake right on the surface where I was planning to serve it. To keep the surface clean, tear some paper towels/parchment paper into four strips and place them in a square on the surface, then place the cake on these strips. Place one layer on the surface, spread with a layer of filling; not to thick or it will ooze out and make a mess. Then the second layer, then slather with the ganache. I did my best to do a neat job but it was still ...umm...let's call it shabby chic. Garnish with fresh raspberries if desired. The extra ganache/crumbs will drop on these strips. Once the cake is frosted, the strips can be gently pulled out, leaving a clean surface behind.

Happy Birthday, my love!
bcake2


Have a sweet weekend, everyone!

Sunday, December 02, 2007

Pumpkin Amti

This is my contribution to the Jihva for Ingredients event, originally started by Indira of Mahanandi and being hosted this month by one of my favorite bloggers- Linda of Out of the Garden. With her incredible posts about "chaar yaar" wali khichdi (khichdi and its "four friends"...can you guess who they are?) and her penchant for sambar, it is not too surprising that I think of Linda as simply a fellow Indian. She certainly knows more about (and cares more about) Indian food that many passport-bearing Indians I know. Exhibit A: for the theme, Linda has chosen the "unassuming yet illustrious" Toor Dal.

In many regions of India, including Maharashtra, toor dal is the star of the pantry. If I were to pare my pantry down to the basic minimum items, toor dal would certainly be the one dal left there. It is my to-go dal for three major dishes that are part of default meals- Amti, Varan and Sambar (the first two are classics that I grew up eating everyday; the last is something I use as a vehicle for all kinds of vegetables).

For this event, I turned to a fairly comprehensive reference for Maharashtrian cuisine- the two-volume Ruchira by Kamalabai Ogale. Among some interesting recipes like pancharas amti (with mixed vegetables, cashews and coconut) and karlyache varan (dal with bitter gourd), I found something that looked seasonal and inviting: laal bhoplyachi amti or Pumpkin Amti.

My first thought on reading this recipe was- wow, there is a lot going on here! Different recipes use various tricks for thickening and flavoring dals: some might use buttermilk, some might use ground-up nuts, others might use a chickpea paste, or have a coconut paste mixed in. This recipe has all this and much more!! I was pretty certain that in the end, the flavors of all these individual ingredients would not come through in the dal, and sure enough, they didn't. But I am not complaining about the result either: it was a tasty and creamy dal happily interrupted with chunks of sweet pumpkin.

I don't often buy pumpkins because it is not very easy to cut and peel the pumpkin. This time, for the sake of this recipe, I took the plunge. I bought a small pie pumpkin (more flavorful for cooking, compared to the giant ones sold for carving). Using a chef's knife, I was able to hack it into two, from stem to tip. Then I stuck the halves into the microwave and cooked them for 8-10 minutes, until they were nearly tender. Once cooled, I found that it was relatively easy to peel off the skin and cut them into cubes.

Pumpkin Amti

toord1
(adapted from Ruchira by Kamalabai Ogale)
Ingredients:
1/2 C toor dal, soaked for 15 minutes, rinsed well, then cooked until tender
2 C pumpkin cubes- raw, par-cooked or cooked (but not mushy)
salt to taste
Paste
1/2 C buttermilk (or slightly diluted yogurt)
2 T besan (chickpea flour)
2 T crushed toasted peanuts (coarse powder)
1/4 C grated fresh/frozen coconut
2 fresh/frozen green chillies (or to taste)
1 t cumin seeds
Tempering
1 T oil
1 t mustard seeds
1/4 t turmeric
1/4 t fenugreek seeds
8-10 fresh curry leaves
Method:
1. Make a thick paste of the ingredients listed under "paste" and set it aside.
2. Heat the oil and add all the tempering ingredients, stirring for a few seconds until fragrant.
3. Add the pumpkin cubes, stir them to coat with the spices. If the pumpkin is raw or par-cooked, add 1/4 C water, cover and cook until it is tender.
4. Stir in the paste and the cooked dal, salt to taste, and some water if the dal appears too thick.
5. Bring to a boil, then simmer for 5-10 minutes. Serve with steamed rice and some pickle or papad on the side.

I wanted a simple vegetable dish to go with the amti-bhaat and took the laziest way out: I made some faux Flower-Batata Bhaaji. My favorite part of simple braised Indian vegetables are the burnt bits stuck to the bottom of the pan. This was a way to roast the vegetables with some spices to make an imitation bhaaji that practically cooked itself.
toord2

1. Lightly oil a large baking tray. Preheat the oven to 425F.
2. Chop 3 medium potatoes to medium-sized cubes or "fingers" (peel the potatoes only if the skin looks too blemished or thick). Cut about 3-4 cups of bite-sized cauliflower florets.
3. Toss the prepared vegetables with 2 T olive oil, salt, turmeric, red chilli powder, cumin powder and coriander powder (all to taste). I did not add mustard seeds or curry leaves, buy they would have added to the taste too. Or ginger or garlic. Whatever flavor you are craving at the moment would work, basically!
4. Spread the vegetables on the baking sheet in a single layer or so, and bake for 30-35 minutes or until the vegetables are tender (test with the tip of a small knife) and browning in parts.
5. Remove from oven, toss with the juice of 1/2 lemon and liberally garnish with minced cilantro.

***** ***** ******

Starting this month, I am trying two new features on this blog-

1. Project of the month: There are so many things that I love eating but that I have never tried to cook at home. In most cases, it is because I have some notion that these are challenging to make at home (which may be true, or not). In some cases, I have just not gotten around to doing it. This is my way of tackling them one at a time. This month's project is to make candy from scratch in my kitchen. I have decided on a recipe from a very respected source, and have a candy thermometer on my shopping list. Watch this blog to see if I am able to make candy successfully this month!

2. Flavor of the month: In the same vein, there are many ingredients/cuisines/cooking techniques that I would love to spend some time exploring. Identifying one a month will give me more a chance to do that. This month's flavor is miso, fermented soybean paste that is widely used in Japanese cuisine. I hope to explore different ways to use this healthful and flavorful ingredient over the course of this month.

If you have suggestions for future "projects" or "flavors", or suggestions about the current ones, your ideas are always welcome. I will be updating these on the right side-bar on the 1st of every month.

Have a wonderful week ahead, everyone!